Deploying Your Django App on Azure
Prerequisites
- Have an active Microsoft Azure account with webapp access
- Have your django code already up on github
Before we start
- Download and extract this zip file and add the contents (
ptvs_virtualenv_proxy.py,runtime.txt,requirements.txt,web.config) to your root project folder (same level asmanage.py) - Add those files to your git repo and push it up to github
Deploying!
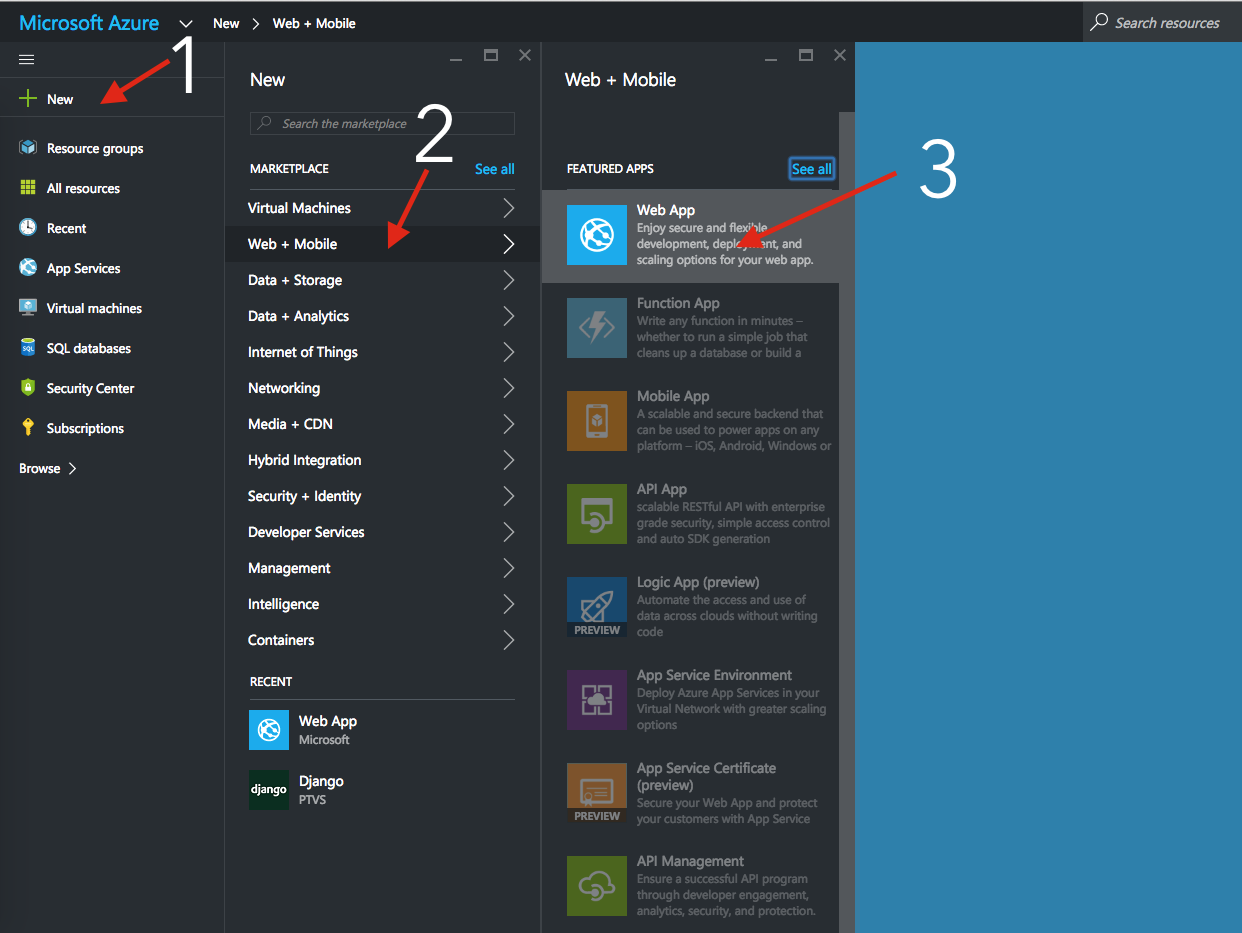
- Click on
+ New - Click on
Web + Mobile Click on
Web App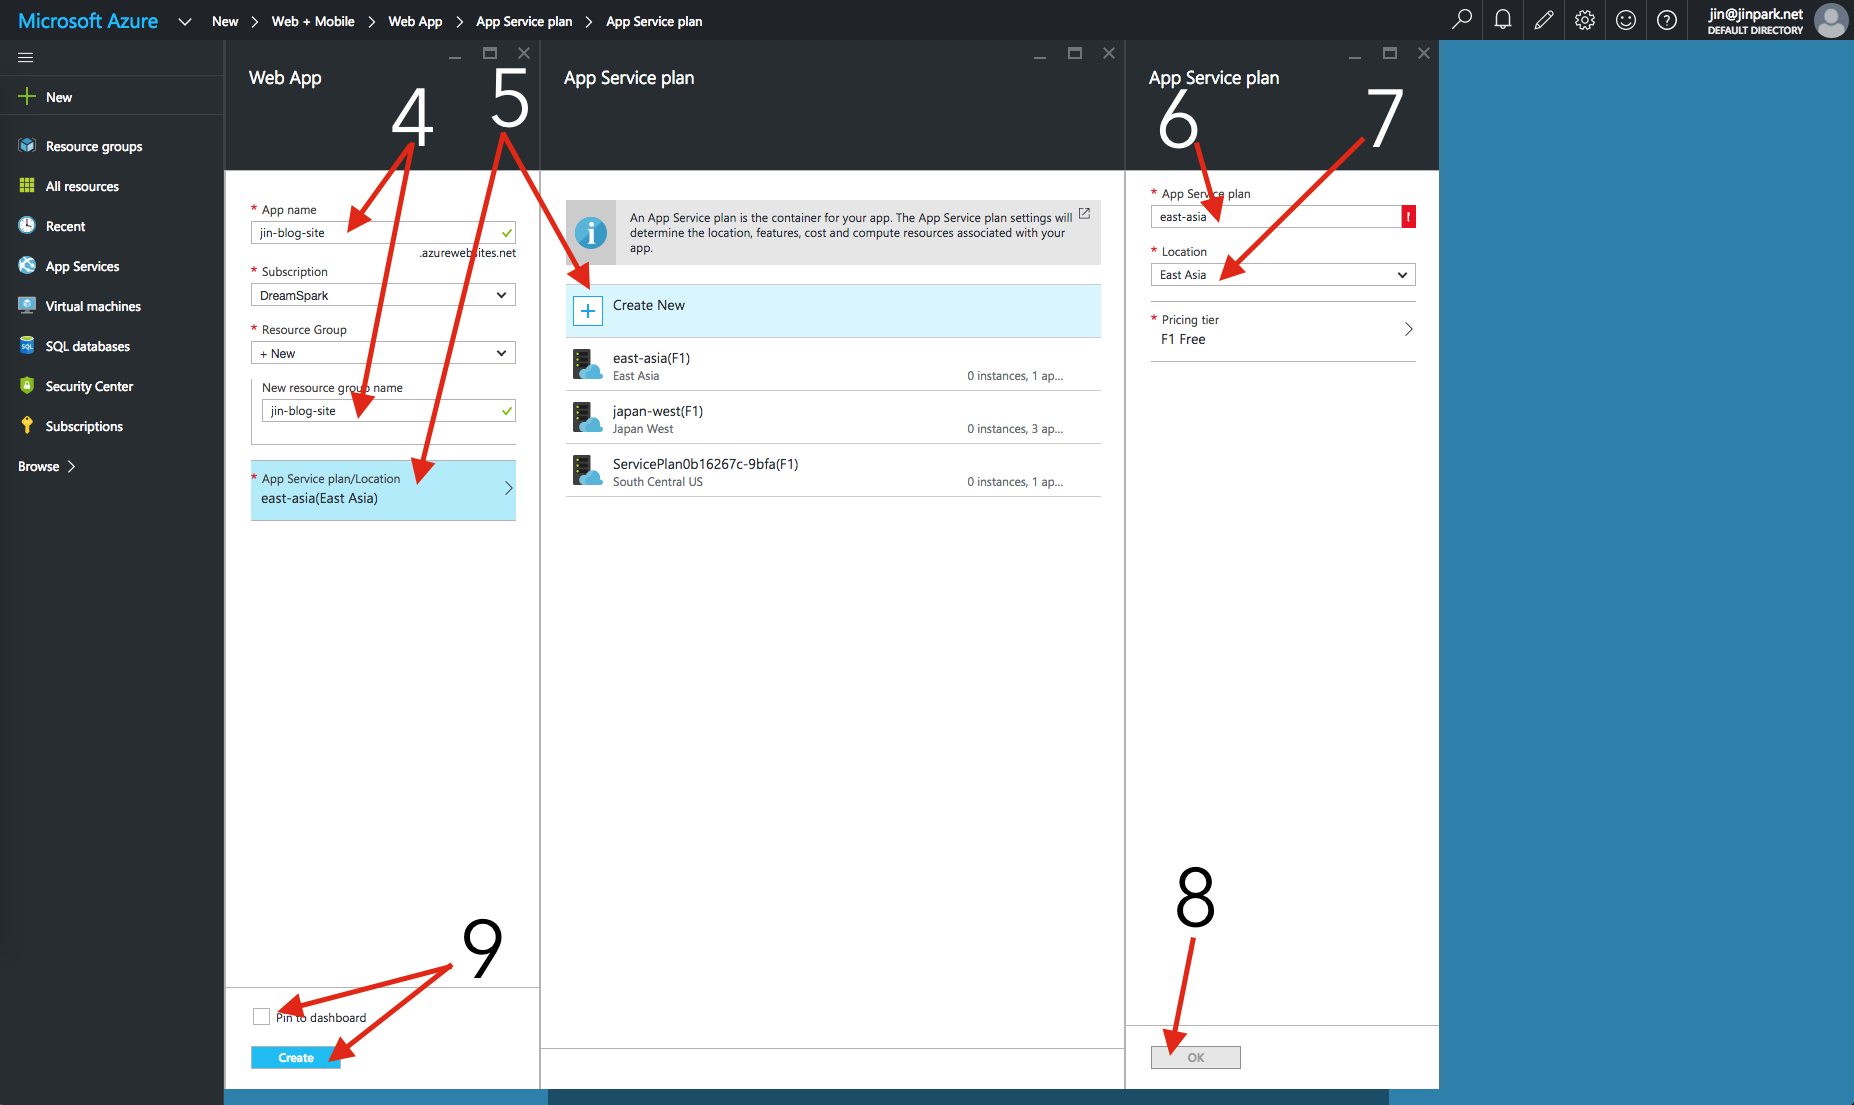
Change your app name to something you want. The URL will be
whatyouchoose.azurewebsites.netand add the same name for theNew Resource Group Name- Click on
App Serviceand click on+ Create Newin the next tab - Add an
App Service Planname. I suggesteast-asia - Click on
Locationand chooseEast Asia - Click on
OK Click on
Pin to dashboardand then clickCreateand wait :)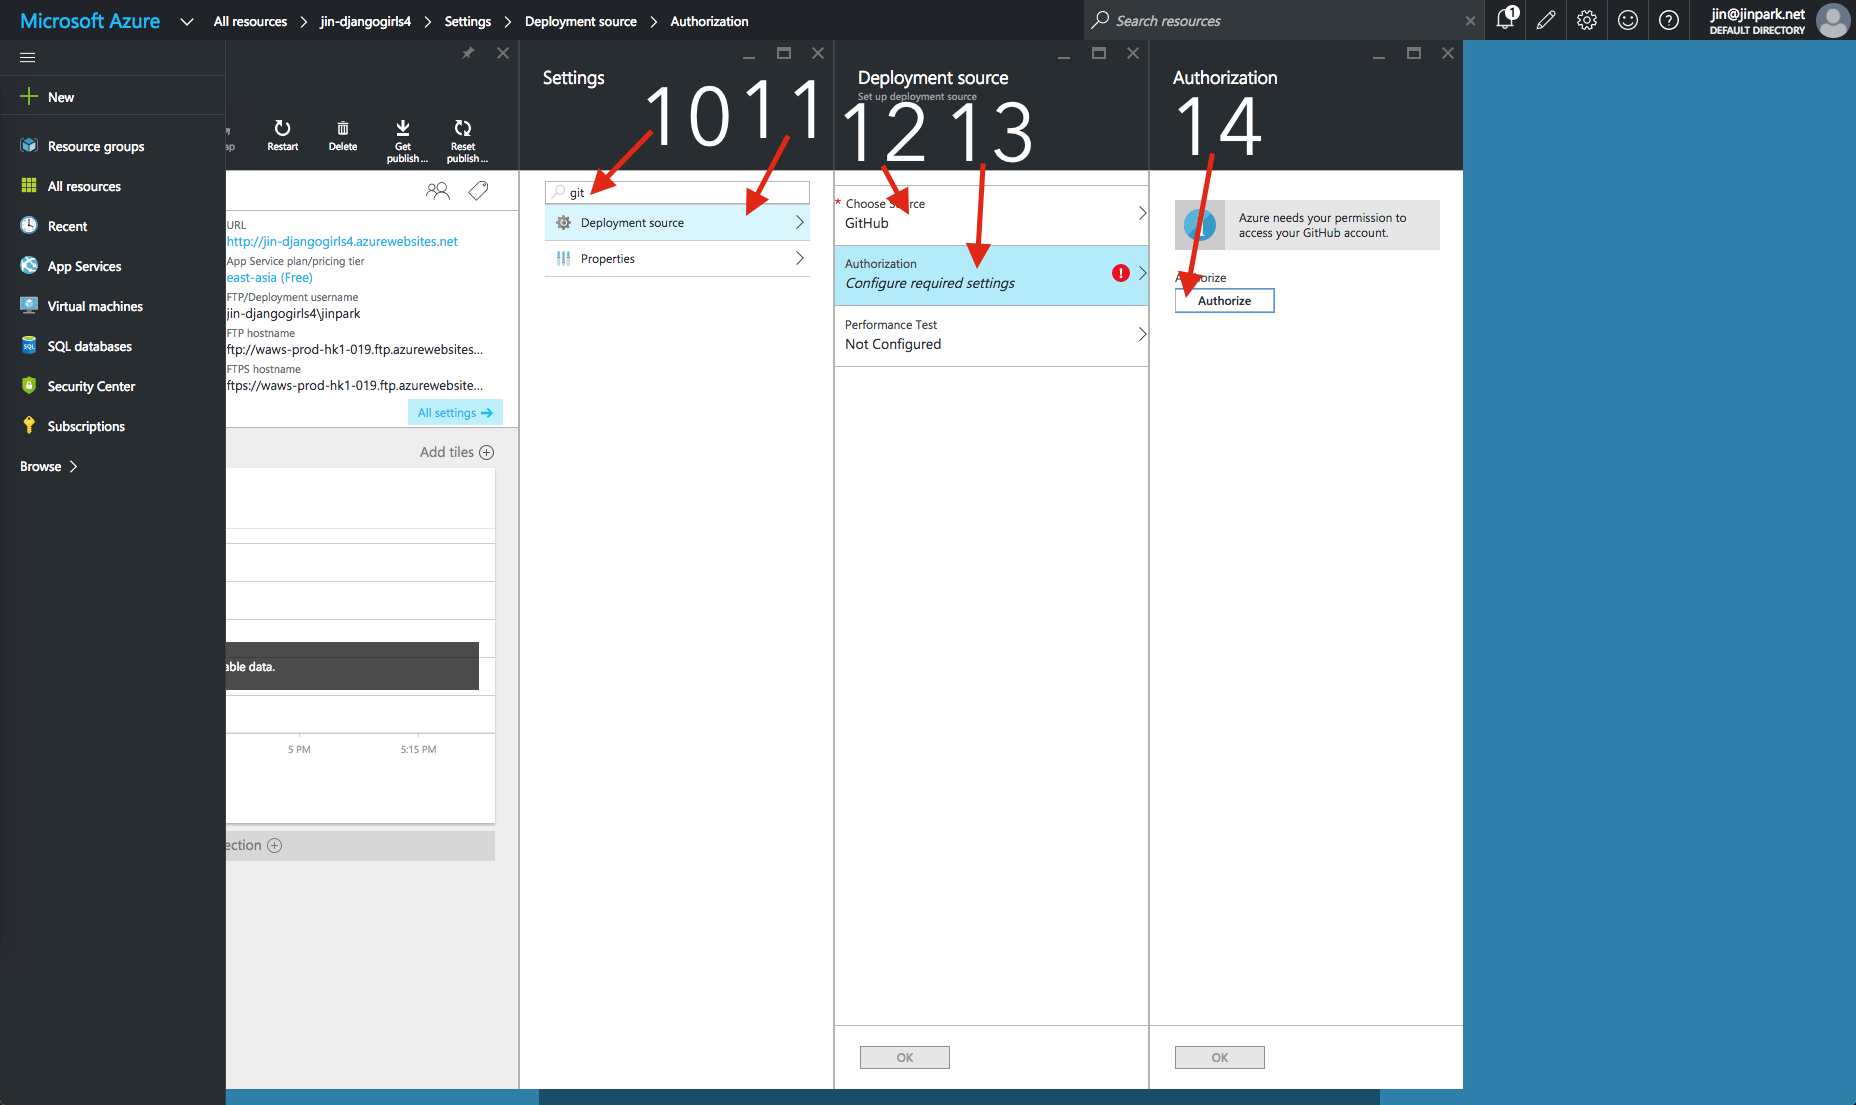
After the app has been created, type in
githubin the settings search bar- Click on
Deployment Source - Click on
Choose Sourceand chooseGithub - Click on
Authorization Click on
Authorizeand clickApprove
Click on
Choose Project- Click on your Django Girls blog project on the right side
Click on
OK.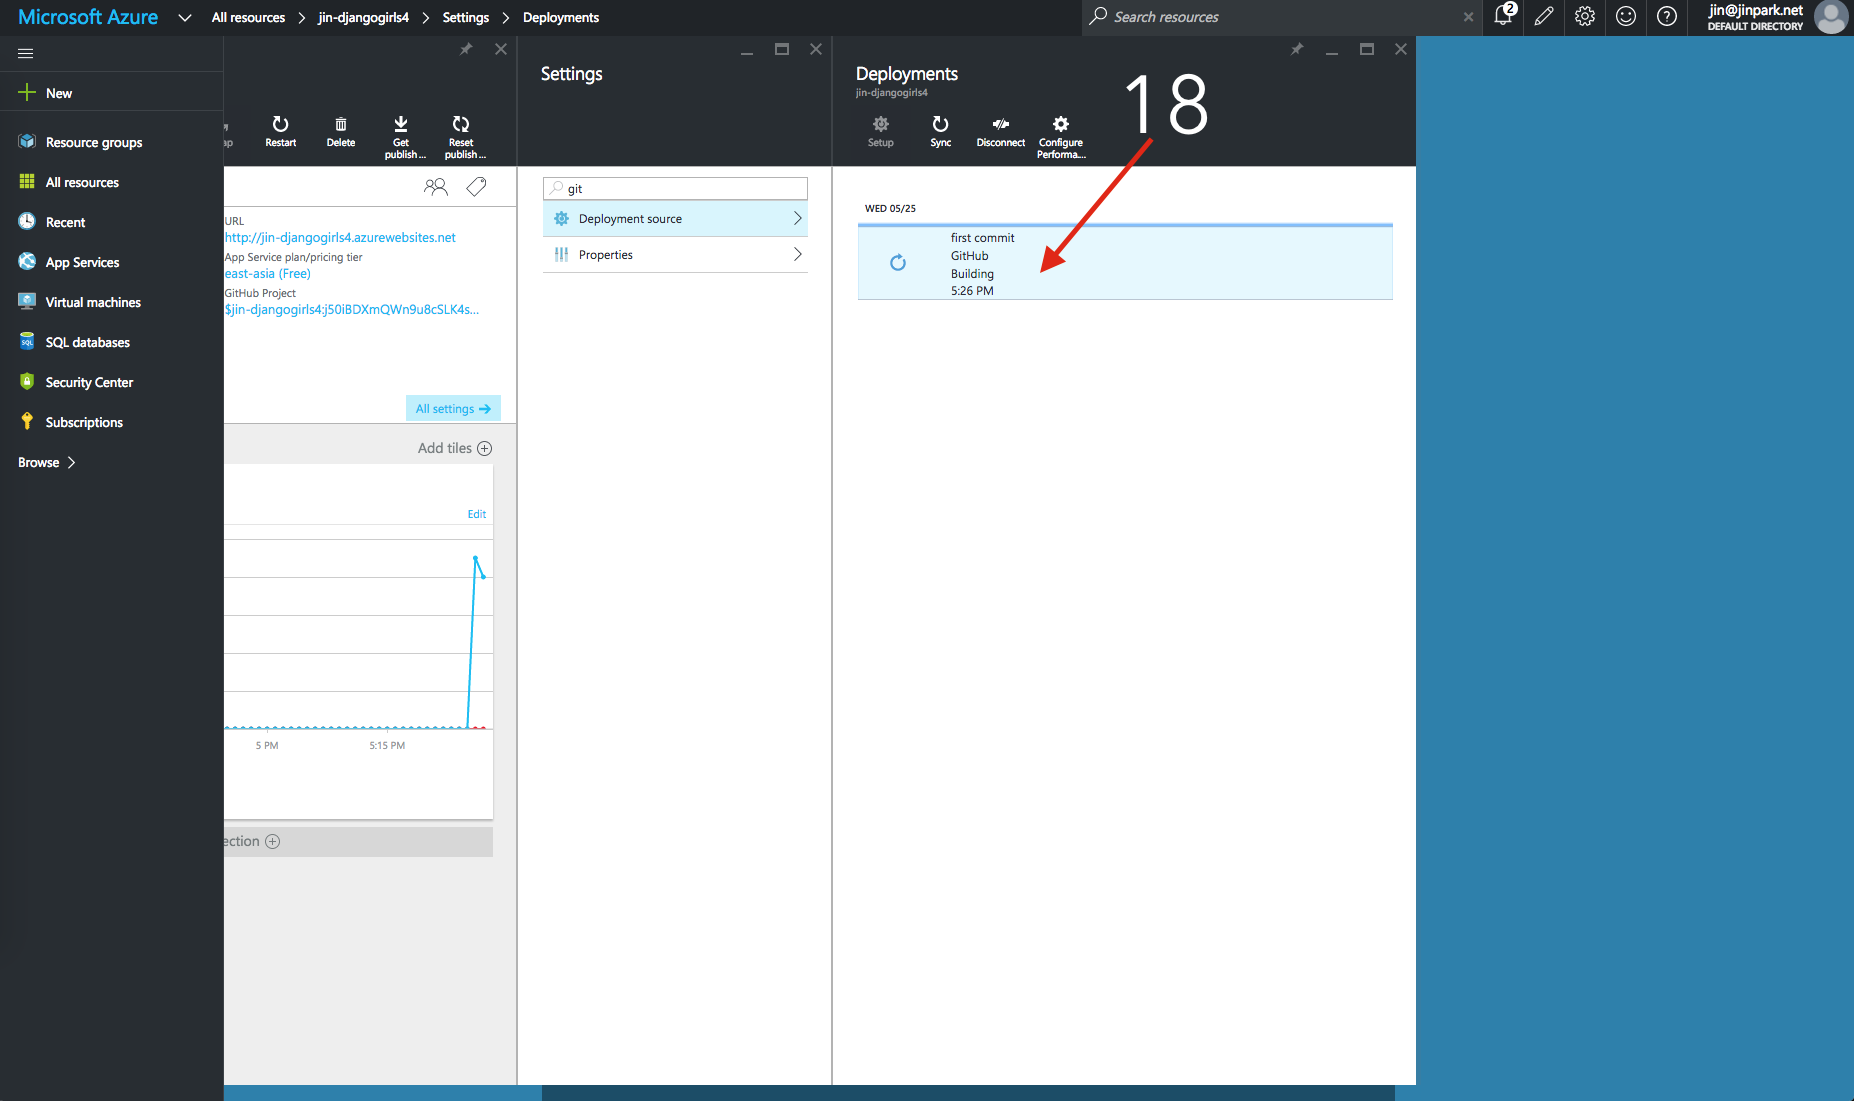
Wait for your project to build. It will take a few minutes. Take a break!
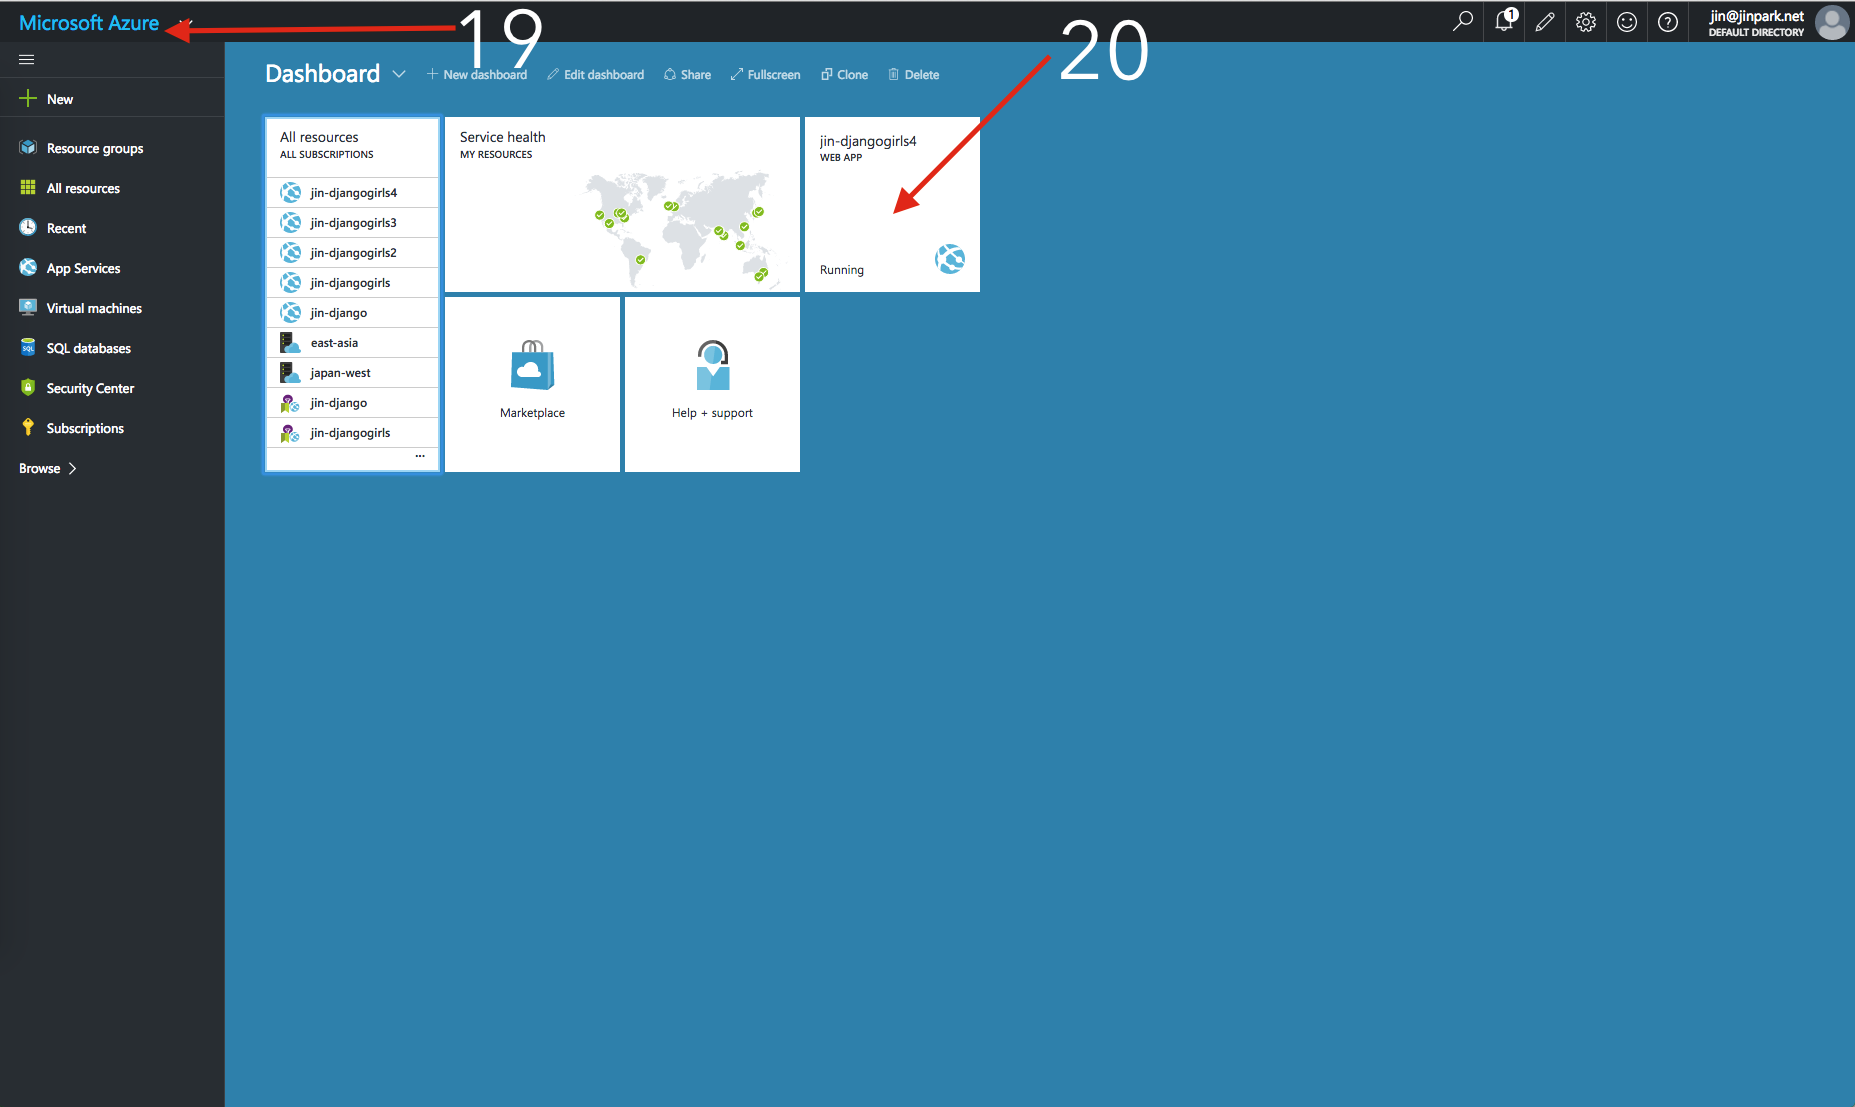
Click on the
Microsoft Azurelogo to go back to the dashboardClick on your newly created app.
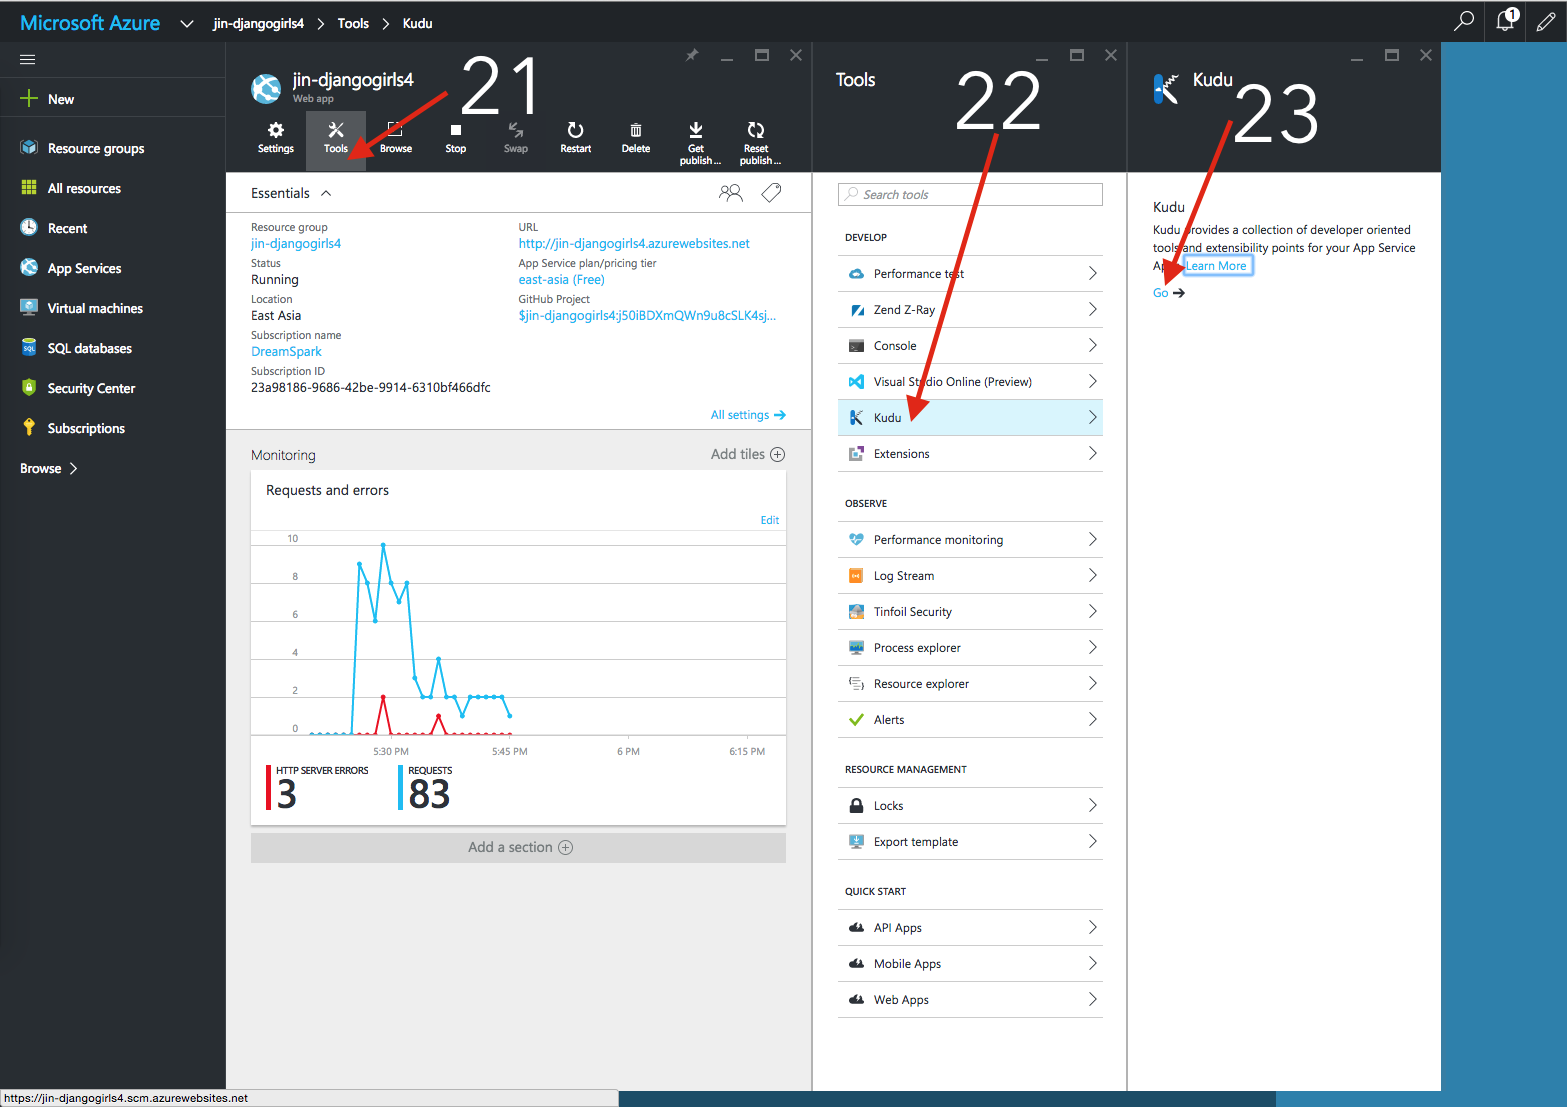
Click on
Tools- Click on
Kudu Click on
Go ->and it will open a new tab/window.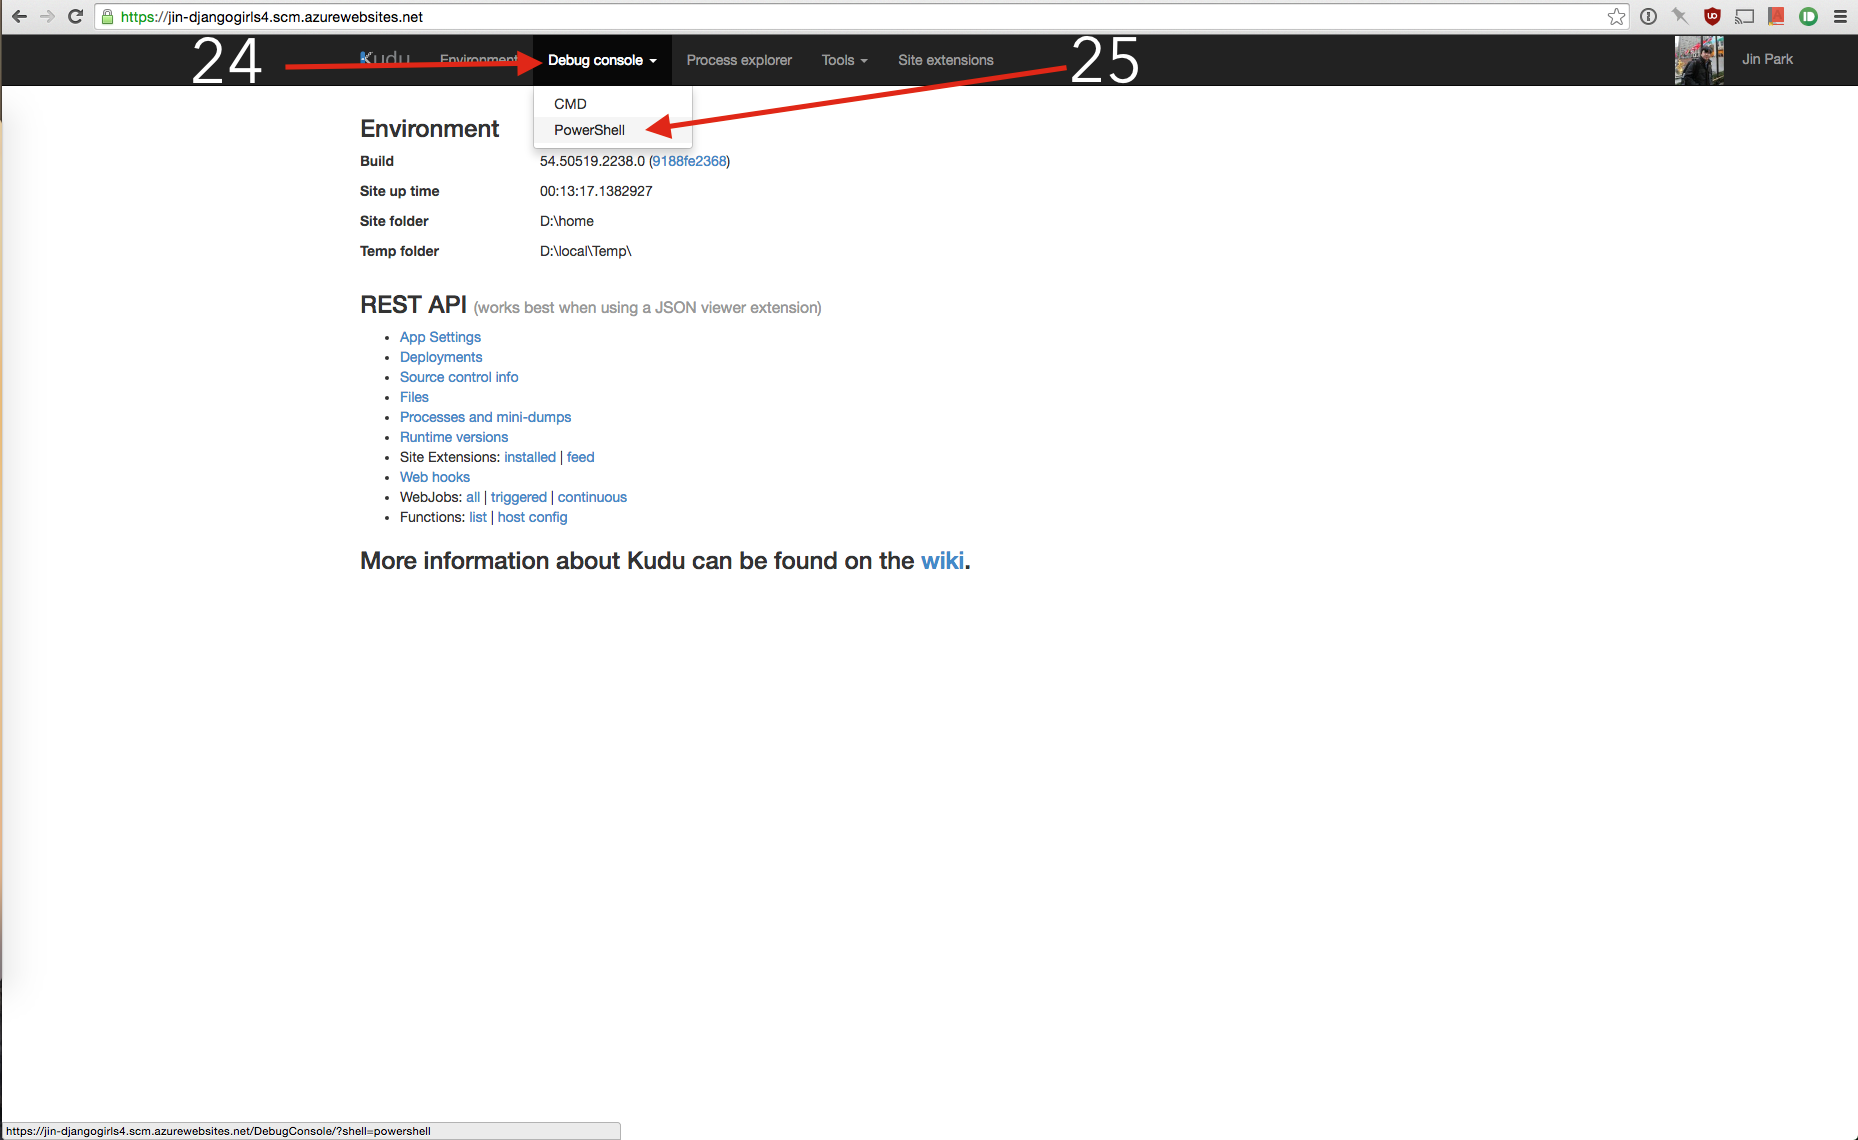
Click on
Debug ConsoleClick on
PowerShell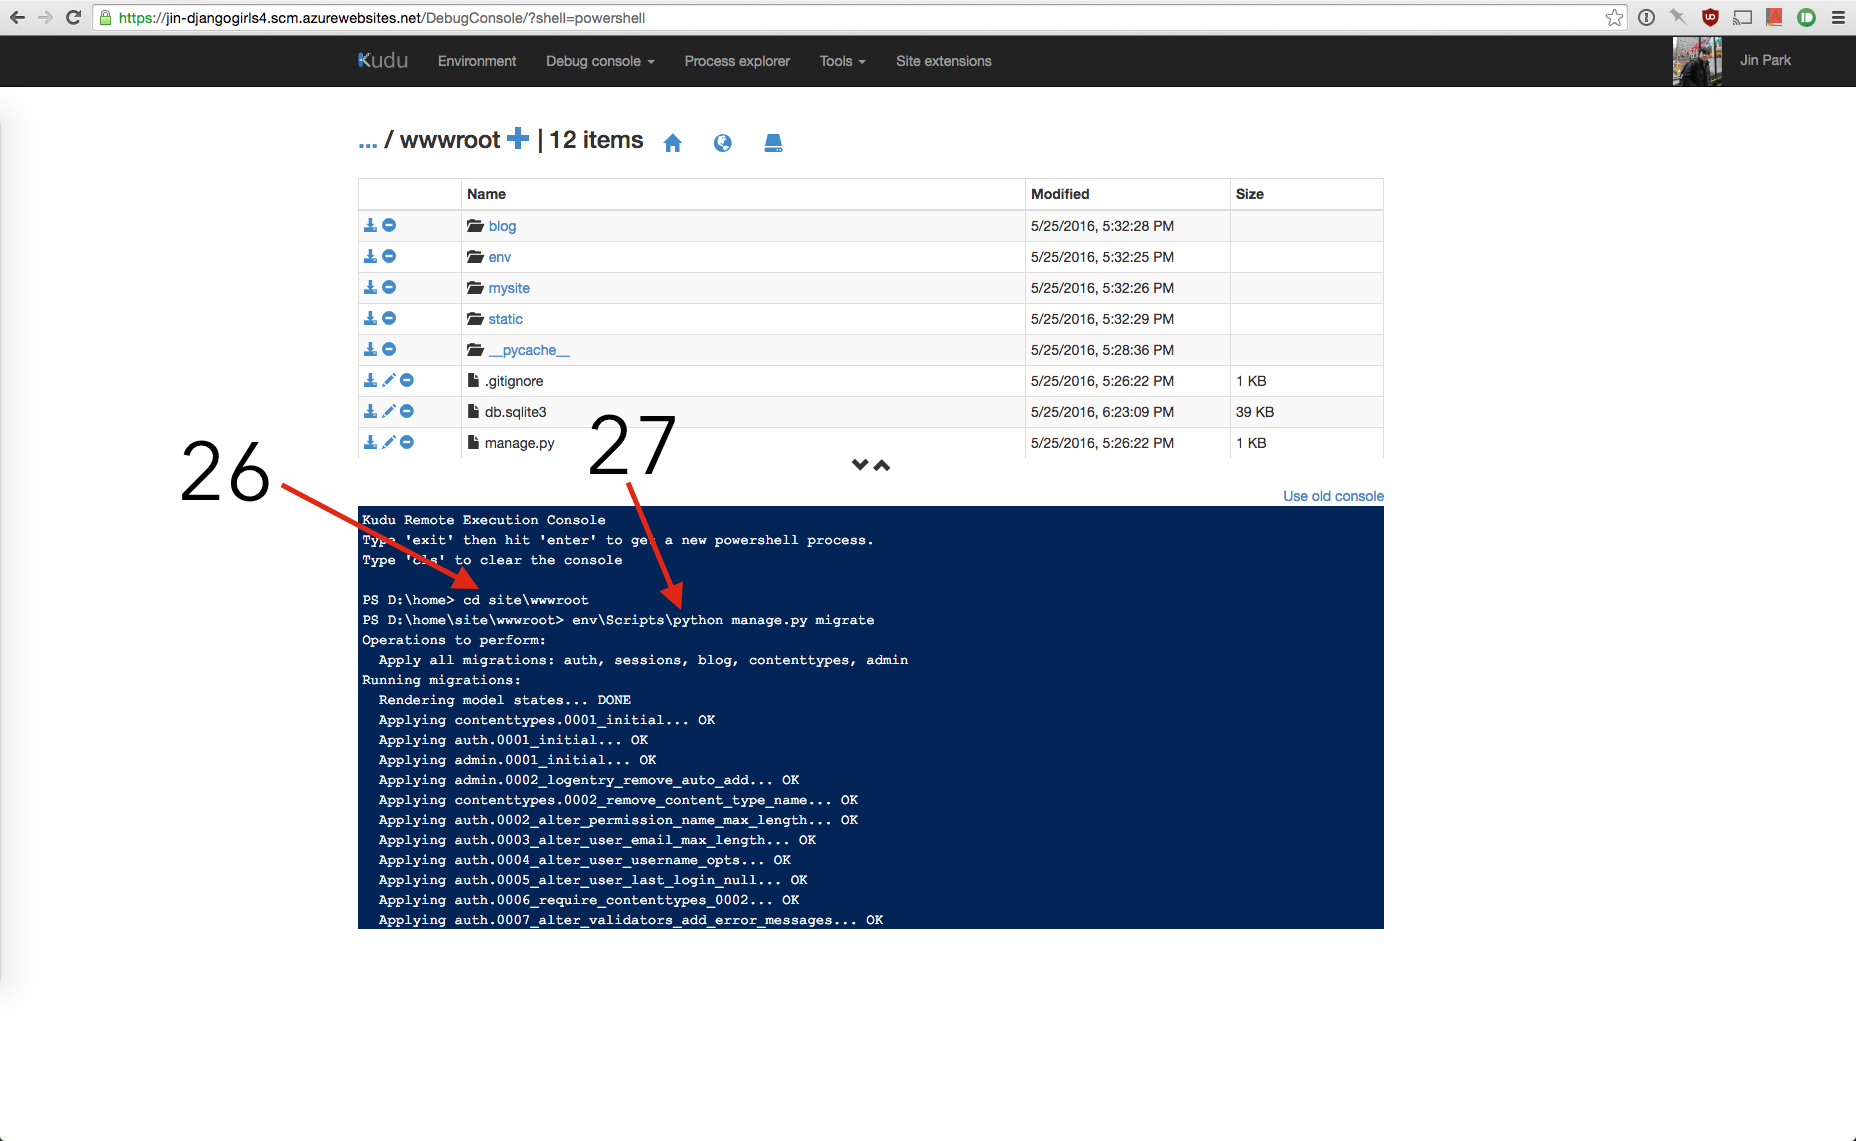
Within the console, type in
cd site\wwwroot- Then type in
env\Scripts\python manage.py migrateand then wait for the migration to finish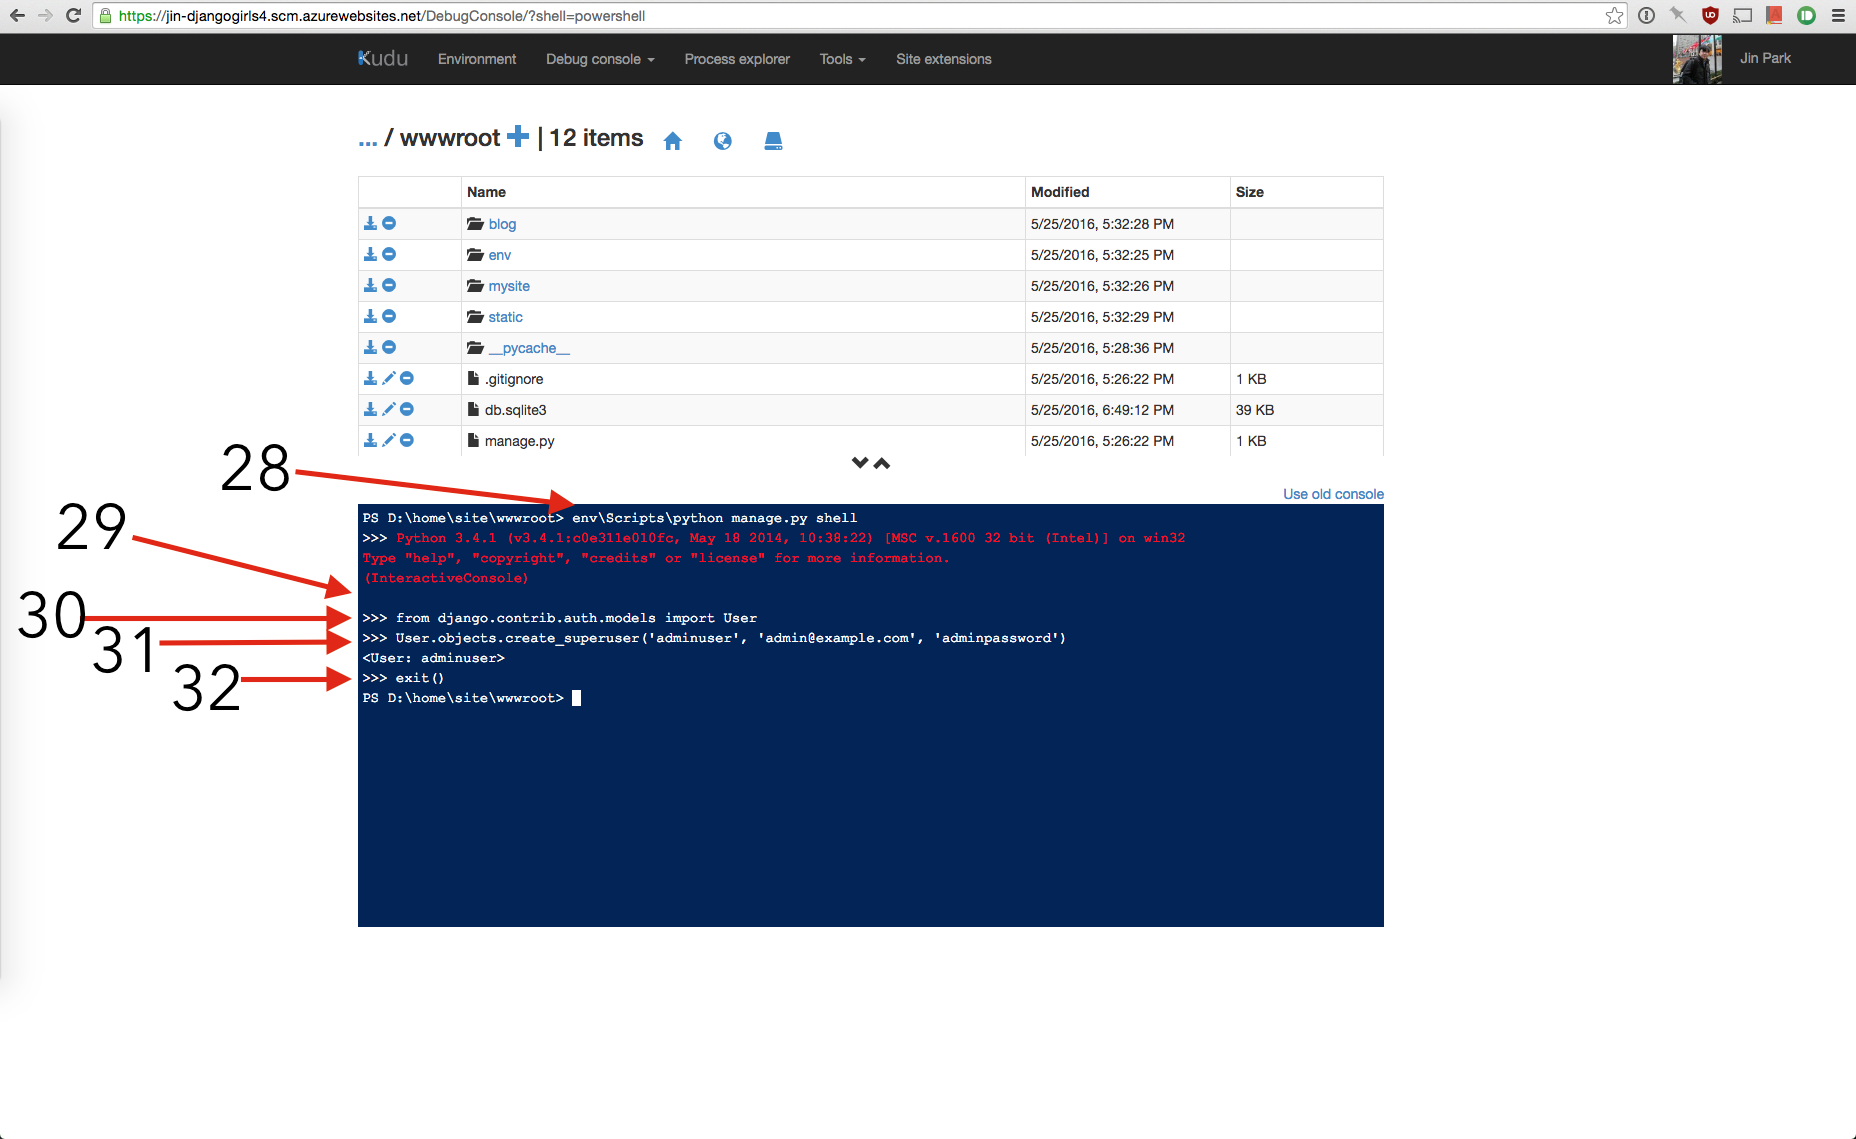
- To create the superuser on the site, Type in
env\Scripts\python manage.py shell - After
Python 3.4.3 ...appears, press enter on your keyboard - Type in
from django.contrib.auth.models import Userand press enter - Type in
User.objects.create_superuser('USERNAME', 'EMAILADDRESS', 'PASSWORD')MAKE SURE YOU CHANGE THE USERNAME, EMAIL ADDRESS AND PASSWORD. And press enter Type in
exit()and press enter. Go back to the previous tab/window where the Azure Dashboard is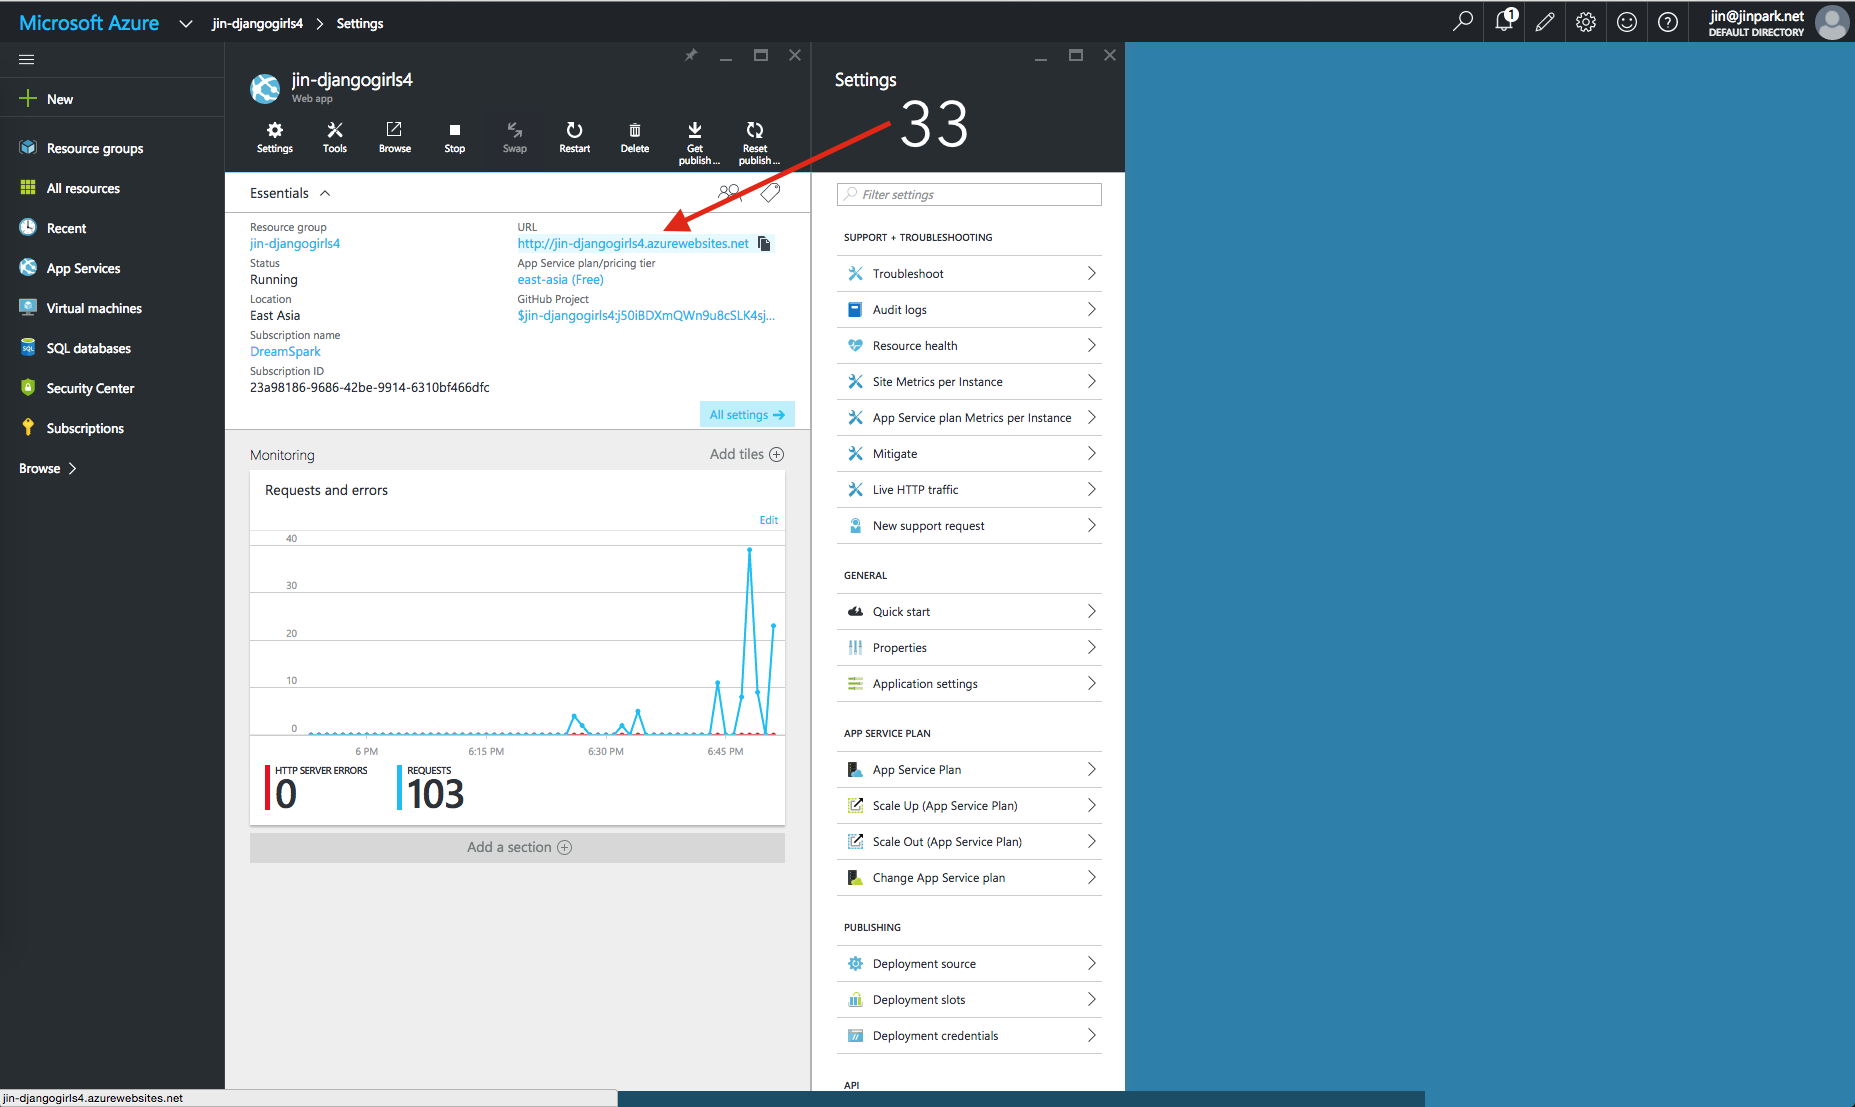
Click on the URL and visit your new site LIVE on the internet!